Re-building the Dewdrop
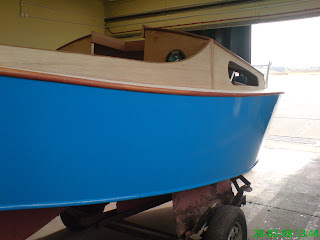
This is the story of the "Dewdrop" (previously "Kathleen-Charlotte"). She's a Wooden Silhouette MK II, designed by Robert Tucker and built by Hurley Yachts of Plymouth in 1960. She was literally saved from the bonfire November 2006 and was given to me as a project. PLEASE READ FROM THE BOTTOM UP and feel free to leave comments!(More info on Silhouette's can be found at www.soia.org.uk) ***PLEASE READ FROM THE BOTTOM OF THE BLOG UPWARDS!***
Wednesday, June 11, 2008
Monday, May 26, 2008
Tuesday, April 08, 2008
The varnish is coming along nicely


5 coats of varnish later! I've got to give the inner cockpit another couple of coats, then I can re-coat all the gloss and deck paint. The new hatches are nearly finished (A massive thanks to Harold for that!) and once they're done I can complete the runners and apply some varnish to them.
The last remaining "big job" is the bottom. It really is a most unpleasant job scraping off all that old antifouling paint, but I'm half way there with it now and soon I can glass round the keels and apply the new paint.
Hope you're enjoying the journey as much as I am!
Sunday, March 16, 2008
The Bright work!


I've got 2 coats of varnish on the outer cabin superstructure now. The first coat was heavily thinned to allow it to penetrate into the wood. Again I've used International for this. The varnish is Schooner and thinners (Flow agent) No. 333. I want at least another 3 coats on so I think I'll be buying in some more!
Wednesday, February 20, 2008
First Primer Coat


I've got the first coat of primer on. This will highlight any areas I may have missed when filling/sanding. These areas will be put right and then primed again.
This process may be repeated several times until a perfectly smooth surface finish is achieved. Only then will the undercoat ang gloss be applied.
Monday, February 11, 2008
Companionway Cut-out


This was a tense moment. All that work of bonding the Coachroof together and then I had to cut a hole in it!!
It worked out perfectly to size and I like to think this was down to judgement rather than luck! Although the plans and long accurate straight edges certainly helped......
As you can see, the new hatch runners were offered up to obtain a precise measurement for the cross member, as the tenon joints vary slightly no matter how careful you measure them on the bench. Let's not forget that boats need that little bit of "freelancing" from time to time!
Coach-roof bonding


I've bonded the last layer onto the coachroof. It's now 12mm as per the original plans. I toyed with the idea of going to 18mm for rigidity, but when I stood on top of the cabin this afternoon I realised that 12mm is plenty strong enough! It still needs to be planed flush and I'll remove the screws before filling in any holes.
Saturday, February 02, 2008
Cabin Doubler Pieces


The first layer of coachroof was glued on today. As you can see from the pictures, I fabricated some doubler pieces all the way round to add rigidity and provide a bigger area for fixing the roof to.
On the front section I've extended the doubler down in between the two windows. This is to give extra strength as the majority of the surface area here is taken up with the window apertures.
I used some left-over 6mm from the roof for this job.


